I was working with a group of young players this week- pretty new to physical training.
I outlined the plan over the next 10-12 weeks. We are going to work on efficiency of movement, becoming more robust and develop your athleticism.
I then asked what did they think that involved… getting bigger was the immediate response.
Getting bigger without having a solid foundation of movement (or structural integrity ) will result in an immediate short term (about 12 weeks) improvement.
In other words the hypertrophy will take about 12 weeks to take effect and then another 12 weeks can be improved upon as well. So, at the end of nearly 6 months training you will be bigger.
3 key tips to getting bigger
Lift heavy for longer. Do big lifts, under loads, for some time.Strongman training, deadlifts, squats are all good ways of gaining mass. If it is just pure mass, with little function, then you are best off learning from some of the Strength Training Legends.
Eat well. There is no point eating junk food, you will become obese. Instead eat a well balanced diet that contains lots of natural foods. There are many sources of protein and testosteronethat can be found in your normal diet. It is a lot cheaper than buying fat shakes too.
Sleep. It is when you sleep that your body recovers and repairs itself. Most teenage rugby players are not getting enough sleep.
The Downside
If your focus is purely on getting bigger, then there are 2 potential downsides:
Injuries: if you are a rugby player you can look forward to shoulder and hamstring injuries because they are the 2 most common ones, and a season of rehab. Is it any wonder that the RFU injury audit shows an increase in rugby injuries?
Slow: If you don’t work on the application of strength through a full range of motion, and at speed, then you might end up getting slower as they found in Australia.
Conclusion
Hypertrophy work– getting bigger- is a goal in itself, but should not be the first thing that young rugby players work on.
If it is, it will hamper your Athletic Development and your rugby skills.
Younger players should look to grow up before growing out. You will be getting bigger as you get older.
Coaches who tell 14 year olds they need to get bigger, are missing the point.
This video shows some of the work I do with the tight five in rugby to make props and second rows more agile:
He took me through a series of exercise progressions that were designed to find my failing point. That then would give him more of an idea about how to design a suitable training programme for me.
I have some idea about strength training, but still managed to take a lot from this session.
The progressions were as follows:
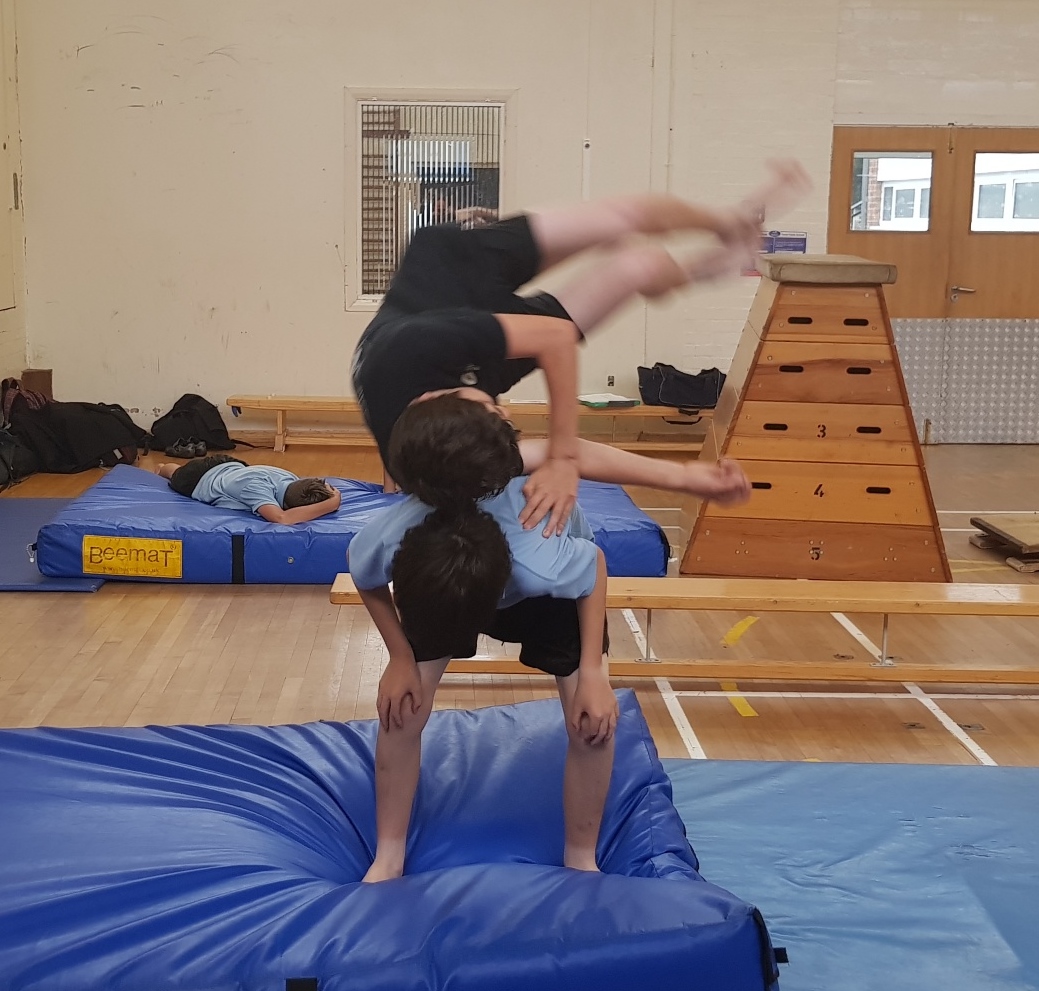
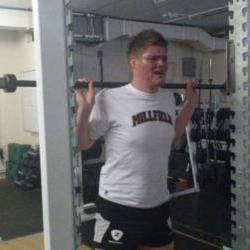
Step up with toes up. An oldie which I have used since 1995 (Tippett & Voight), but taken to a new height by Simian. The foot on the ground has its toes up, forcing the foot on the step to do all the work.
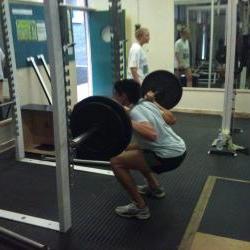
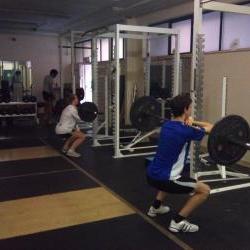
The key here is then to lock the hip at the top of the step which requires more control. You can see the two young athletes below working on it in our gym.
The progressions around this are to do a decline step- which emphasises quad work more, or to use a higher step– which emphasises hip flexors more.
Once the height can be achieved, load can be added with dumbbells, then barbell either in front or back.
The knee on the step needs to be pushed forward so that the hip extends first, then the knee (hip-knee-ankle in that order). The exercise must reflect what happens in the sport.
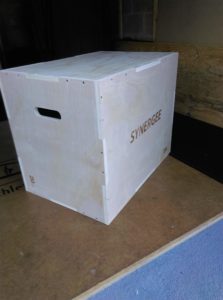
These high box step ups are a great use of the box that coincidentally our club had just received before Christmas.
Split squat or lunge?
The next exercise was the split squat, the difference between that and a lunge is that the shin remains vertical in a lunge but has a positive forward angle in the split squat.
Here was another exercise that a visual demonstration would have helped me with- instead, after several misfirings from me, and less then useful input from the coaching bystanders, I got the hang of it.
Pushing the knee forward is important to lower the body so that the rear knee touches the ground, then coming out the hips must move up first and then back. This ensures that the same pattern of hips-knees-ankle extension occurs. It is tempting to push back.
I explained that due to my background- pushing in and out in a low stance without raising my hips was part of my karate sparring drills.
Still got it
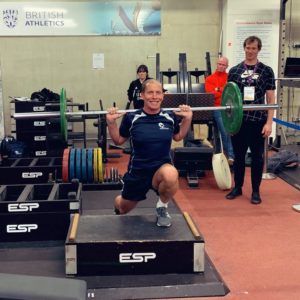
The progression from here was with the front foot elevated, a low stable step is enough.
This creates a lot more hip flexion and extension and is good for those athletes who are yet unable to do a full squat.
I then had the pleasure of receiving more weight (remember, the aim was to find my failure point).
When the barbell is in front a lot more hip and buttock is used compared to when the barbell is on the back of your shoulders.
Front squats and back squats
We have covered the difference between back squats and front squats previously, but I still gained a few worthwhile cues and technical points. It is always worth getting coached by someone new to get a fresh perspective, especially if, like me, you are training on your own all the time.
Too many cues lead to athlete frustration
Simian wanted me to feel like I was “strangling yourself” and to rack the bar higher in the Front Squat. He also told me to push my knees out wider and over my toes more.
On the way down I was to flex my ankles, then knees and then my hips (the same as landing mechanics) and on the way up to do the reverse (same as acceleration).
He thought my front squat was ok, but noticed that my back squat had a shift to the left when I lowered down. He wanted me to squat with very wide hands and wider than normal legs for me.
Coaching the person in front of you
So far so good, a coach has seen some good points, but then found a weakness or error and now attempts to correct it. The back squat with load was my “failure point“.
Simian had two solutions to help me:
Practise Cossack squats (a lateral lunge with one foot facing sideways) to help my tight left adductors and my tight right hip flexors. This, he surmised, was the reason for my poor squatting technique. No problem.
He stood and held my right hand and rubbed the bones around a bit. Then he watched me move again.
Some people may enjoy having a Frenchman hold their hand and look dreamily into their eyes, I am not one of those people. I noticed no change in my movement.
At my age a decent cup of tea is essential for squats
Some helpful members of the audience then started throwing in their suggestions like “It’s because his femurs have funny shaped heads”. I was way out of my depth here; surrounded by coaches with X-Ray vision.
This was where I started to become sceptical and moderately frustrated (I had yet to have a cup of tea that afternoon).
I have injured my right knee previously whilst sprinting. It has been aggravated by landing incorrectly from a somersault. I think I favour that side when back squatting.
Repeatedly leaning to that side may well cause a learned effect and my left adductors and right hip flexors to be tight as a result of my bad technique, rather than the cause.
If what Simian had said or done had made an improvement, I would be a convert. It might well work in his environment with more time: I have empathy for trying to present to a group of coaches with a subject I have just met.
I much prefer creating movement problems for the athlete to solve, like the Cossack squats, than trying to find the magic pressure point to release.
What I can say for certain is that in the context of this environment, despite having some competency in the gym, I was confused. This could be because Simian kept referring to me in the third person and was addressing the coaches, rather than coaching me.
The good news was that it reminded me not to do this with the athletes I coach. If I do make a coaching point to the whole group using a subject, I then need to ensure that I actually coach the subject too!
Depth jumps
The final part of the workshop was a bit less structured and became more of a loose discussion. It was based around depth jumps.
Once again I was chosen to be a subject,
and to perform an exercise I rarely practise.
Serendipity: this arrived at our club before I attended IFAC
I am used to landing following vaults and jumps in Parkour, but often with a roll afterwards. I am unused to landing from height with a stiff foot and ankle. Once again I think being a subject was less useful in the context of trying to learn.
I simply couldn’t get the point of the exercise: Simian didn’t demonstrate, so there were a lot of verbal cues flying around, with heckling from the side lines.
If I was supposed to land with pretension, I think the box was too high to start. I would
always get the athletes to practise off a small
step at first and then get higher.
Simian was trying to find “failure points”, but the learning
effect would be interfering in his assessments.
I tried with shoes on and then off, and
then had my ankles and feet rubbed and moved around a bit. No improvement in
what I was doing occurred, but I kept saying “I don’t know what I am supposed
to be trying!”
My failure point was being uncertain of the
point and intent of the task we were trying to do.
A
few interesting points did come out:
Ankle mobility in throwers is important because it allows the torso to remain more upright during the rotation. Lack of mobility means that the knees or hips have to flex to get lower which means the torso is more likely to bend too.
Two of the “athlete basics” are a good hip extension without pelvic tilt, and being able to fully extend and flex the ankle.
The toe test exercise to see how your ankle and feet work when flexed compared to extended. Try this at home: keep the main part of your foot on the floor and raise your toes off, then curl them underneath. Then try the same with your ankles flexed.
You will probably find that your feet need to work a bit
harder. Remember that they are the first point of contact when running, so
neglect them at your peril.
Summary
Simian succeeded in showing his methodology. He found the “limiting factor” in myself and LC and then showed some ideas on how to develop our weak points.
This was enlightening.
He looks for the biggest limiting factor because that will give you the most gains if you can improve it. This makes sense.
Some demonstrations would have been useful, as well as remembering to coach the athlete, rather than just present to the audience. When attending a seminar I always look at how the coach coaches rather than just what they coach.
Simian was very good at explaining WHY in his approach, but less so in some of the exercises.
I took extensive notes, even though I attended only one of the four strands in the middle of day three. I have missed more than I have recorded, so other coaches may like to leave their feedback below.
I have already applied some of the lessons learnt, trialled it myself, and I will be meeting with Rhys Llewellyn-Eaton in 2 weeks’ to share ideas as he was also there.
I would recommend IFAC to other coaches who wish to learn about improving the athleticism of their players. The staff and presenters were friendly, approachable and were all there to help educate the attendees.
Working with young athletes, many of whom are P.E. students we are asked the same questions a lot. Here is our A-Level PE guide that answers a few of the common questions on strength training.
What is strength?
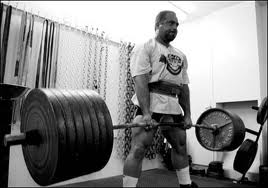
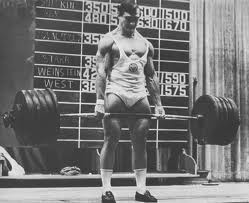
Powerlifting is one strength sport
Strength is generally defined as the maximal force which can be exerted by muscles or muscle groups. However, muscles can work at maximal effort during concentric (shortening), eccentric (lengthening) or isometric (static) muscle actions. In addition, the dynamic movements can occur over a wide range of speeds.
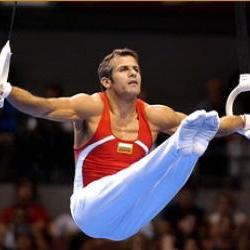
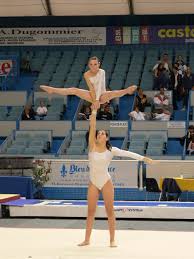
Who is stronger- a Gymnast or a Powerlifter?
In order to define strength, it is necessary to specify the movement (including speed of execution) being measured. In this way, both the gymnast and the powerlifter could argue to be the strongest.
Gymnastics is also a strength sport.
The gymnast must produce high forces at great speed to perform somersaults including multiple twists and rotations, whilst the powerlifter must produce high forces to lift heavy loads with little focus on speed.
Why is strength training important?
Strength can take a number of meanings. Strength underpins all movements needed by athletes including running, changing direction, jumping, pushing, pulling and throwing. Strength training is therefore essential for all athletes?
Strength training is commonplace in collision sports such as rugby where high forces are increasingly important to produce powerful movements in contact situations. Similarly, athletes such as sprinters have long gained benefits from strength training due to their need to produce large propulsive impulses during acceleration.
However, strength training can also benefit long-distance athletes and athletes from sports that place great emphasis on aerobic endurance such as football, hockey and netball, etc. As well as having a positive influence on injury prevention, strength training can improve performance by enhancing the running economy and efficiency.
How best to train strength?
As strength is mode-specific, training should be specific to the movements needed by the individual and their sport in order to maximise performance. An example of a football training session with specific strength can be seen here:
However, this is not to say that 100% of training should be focussed on these movements, as all-round strength and structural integrity is necessary to maintain athleticism and reduce injuries. In order to ensure all-round strength athletes should be performing a range of squatting, pulling and pushing exercises as part of their training programme. These exercises should be
-Functional (i.e. moving free weights rather than sitting at machines)
-Progressive through levels of stability (e.g. from two-legged squats to single-leg squats)
-Involve moving in different directions (e.g. horizontal, vertical, lateral and rotational).
Sometimes it is useful to get a baseline measurement of how strong you are. This can be done simply, as this video shows using strength tests from Thomas Cureton’s book, “Physical Fitness and Dynamic Health.”
Avoid doing ‘Maximal’ testing in strength, especially with A-level PE students. I have seen far too many instances of 1 Repetition Maximum tests on things like leg extensions and Smith Machines where no skill is required and load can be added easily. This is a surefire way to hurt people. (This guide to fitness testing will help you).
Get the Plan right
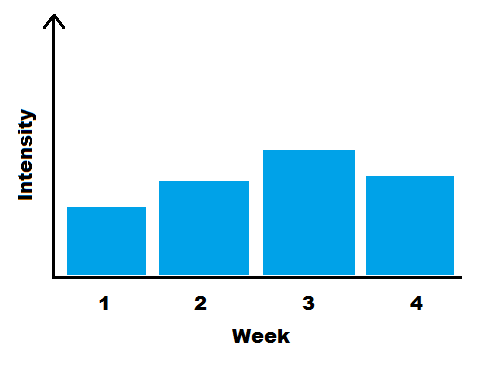
Strength training often occurs in blocks of a set number of weeks, with a high volume of training to provide a stimulus for adaptation. This is then followed by a phase of unloading to allow the body to recover and adapt physically before the next block of training begins. A common example of this is 3 or 4-week blocks of training separated by a week of unloading where lower-level exercises are used to maintain strength.
Without these recovery periods, the body would not recover from the physical stress and the athlete would be at severe risk of burnout.
Conclusion
Strength training is important for all athletes as strength underpins all movements performed during sports. To maximise performance, training should be specific to the sport being trained for. This relates to the types of exercises performed as well as the method of training e.g. the need to perform movements at speed and in different directions.
Strength training should always be properly structured and follow cycles that allow for progression and also recovery and adaptation. Without this, athletes may find themselves suffering from injury or burnout.
Matt Durber
If you like this, you might find our Glossary of Terms Useful for Revision
This is often the thought of players who are forced to undergo various fitness tests and long slow runs as part of a pre-season training and fitness programme.
Doing repeated doggies, shuttle runs and various circuits, with barely a ball in sight, is enough to put most players off.
It doesn’t have to be this way.
(Contact James if you want help planning or running your pre-season training).
As a Coach, you can make pre-season training interesting, relevant and more fun. Your players will be fitter, faster and stronger. More importantly, if they are willing, engaged and able to play, they will put more effort in.
Why Pre-Season Training Needs to be Turned on its Head
Do you start your pre-season with an endurance fitness test? Your players turn up and do either the bleep test or the yo-yo test.
You then train them for a few weeks doing lots of endurance running and retest them before the season starts.
Is this interesting, relevant or fun?
Or are you just gathering random numbers?
I used to do exactly this. When I started working with London Welsh RFC 20 years ago. My plan was this:
Test the players
Develop an aerobic base.
Build up into intermittent endurance work with strength training.
Finish the last 2 weeks with speed training.
Re-test the players
I checked this plan with some “expert physiologists at Brunel University” they thought it was a good plan.
Of course, they did: in a laboratory situation, this would look good as I was training for the test.
Over the last 10 years, working with hundreds of athletes I now realise that the situation should be reversed.
As an athlete, I hated getting tested if I didn’t get the feedback, if I didn’t think it would help me fight better, or if there was no follow-up training plan to help me improve.
Get Fitter, Faster and Stronger in Pre-season
As a coach you want your team to be Fitter, Faster and Stronger. But fit for what? You want them on the pitch ready to train and ready to thrive in competition when the season starts.
So, I look at developing 3 qualities:
Efficiency: Get them moving well and with control
Robustness: Get them able to do that under load, faster, further or heavier.
Resilience Get them able to sustain that quality of movement or load for longer.
Who wants to practice bad running, bad lifting, slow agility and irrelevant skill patterns?
It is demotivating as a player, and a waste of your precious Coaching time as a Coach.
How to Start Pre-season Training
Testing and evaluation are an important part of pre-season. But just telling players to run further or run faster to improve their test scores may only reinforce their bad technique, and could lead to injury.
My overriding consideration as a Coach is to give the players the tools to do the job.
Choose your tests carefully. If you are in a team field or court sport like Football, Hockey, Rugby or Basketball then the bleep test or yo-yo tests are relevant to the demands of the game. More so than a 1500m or 5km running (or even worse rowing) test to assess your endurance (more test detail here).
But, understand that these tests measure more than endurance. They measure your ability to: accelerate, brake and change direction. All of which are needed in your sports (An example can be seen in this video).
So, in conjunction with one of those tests, your first week would be well spent assessing the players’ ability to control their own body.
Here is a FREE handout on the 5 tests that I use with players. (This is the Foundation week 1 of our Sports Training System)
My motto is “Little things, done well, consistently.” If the players are given the tools to do the job, they gain confidence and progress accordingly. You have 6-12 weeks to get players fit, you have to ask yourself
Easy to get players tired
Are you making them better, or just making them tired?
Over the next few weeks we will be looking in detail at a different quality that is needed in pre-season training:
If your players can accelerate and change direction faster, are strong enough to handle the braking forces when stopping and have a higher top speed, they will improve their test scores.
You can then work on doing more quality movements with a shorter rest time: this will then lead to an improved work capacity.
Most importantly: they will be able to transfer those fitness qualities to the Game where it counts.
Please share with your teammates and fellow coaches. Have you got a favourite pre-season fitness test? Please leave a comment below.
“How much strength training should I do?” is a question I am often asked, or more likely “Why should I lift weights?” But these questions have been around for some time as the following Old School strength gurus like Dave Prowse of Star Wars fame will tell you.
Our regular readers and athletes will know the approach we take working on all aspects of the Strength Spectrum, but in different degrees according to age, stage and sport.
I recently met Tony Caldwell, and ex Powerlifter on a Level 1 S&C courseI was running. He had some interesting thoughts and stories on his past and that of his peers. I thought it would be interesting to share some of his thoughts.
We have some shared history as we both trained at the Crystal Palace Weightlifting Centre in our careers (him some time before I was born!).
Tony Caldwell Training Background
My own career is fairly unremarkable really but here goes! I played rugby both union and league at school and local club level as I grew up in Yorkshire.
Dave Prowse
Around 1966 after moving to Surrey with my parents I started training at the Crystal Palace National Recreation Centre under the tutelage of Dave Prowse who at that time was British Heavyweight Olympic Lifting Champion.
He later went on to fame and fortune asDarth Vader. The objective was to gain some strength & size to aid me in rugby.
The workouts revolved around about 6 basic compound exercises including some Olympic lifting such as clean & press,power cleans & jerks.
At that time the overhead press was one the Olympic lifts but was dropped sometime around the late 60s as it became difficult to referee (a bit like the scrum now!)
In 9 months I gained from 9stone 7lbs to 11 stone using this routine 3 times per week and basically eating anything that didn’t bite back.
I would use this approach even now for someone who really needed to gain size and strength.
Over the years some of my best gym poundages were 330lb bench press, 400lb dead lift and 415lb squat. In competition these were somewhat less 285, 380 and 365 respectively at a body weight of just under 13 stone. I only competed at local level and also dabbled in some bodybuilding competition, although I never liked the extreme dieting and was not willing to take the steroid route.
Old School Strength Training Methods
As a Powerlifter, I used some of the methods advocated by these legends over the years.
Bill Pearl. A 4 time Mr. Universe winner who during the 1960s planned and delivered the fitness training for NASA astronauts and who also has a background in wrestling.
Pearl is 80 yrs old now but is still in great shape training every day. His website contains much information including a complete free course entitled 20 months to a championship physique.
His teaching is very much aimed at bodybuilders & people who just want to improve their appearance therefore is fairly high volume and time consuming. The routines are well explained however and are useful for the very good exercise illustrations.
Bill Starr
Bill Starr. He was a USA national Olympic lifting champion in the 1960s and was probably the first S&C coach in the NFL when he joined Baltimore Colts around 1970. I believe he was also fitness coach for Washington State University football around this time.
He developed the 5×5 system whereby he utilised what he called the “Big 3” namely power clean, bench press and squat and had his athletes working with heavy weights on a 5 sets of 5 reps routine.
He would also change things around occasionally and use exercises such as rows and incline & overhead press. He also wrote a book called “The Strongest Shall Survive” Read Starr’s Starting Strength Article here
Reg Park
Reg Park. Park used a 5×5 system in the 1950s before Starr developed his own and I think you can still purchase his course. He was a 3 time Mr. Universe winner and one of the strongest bodybuilders ever with lifts such as 500lb bench press 600lb squat and incredibly 300lb press behind neck.
This was pure old school strength as Park had no background in Olympic lifting. There is a website but sadly Reg passed away about 3 years ago at the age of 79 as a result of skin cancer. (Old bodybuilders spent their whole lives in the sun!)
HIT Training. At the other end of the spectrum is High Intensity Training or HIT. Basically this is the complete polar opposite of what Pearl recommends and refers to the performance of 1 or at the most 2 sets taken to complete failure. This after warm ups.
Generally the exercises used are heavy multi joint exercises such as squats, leg presses for legs benches & inclines for chest overhead presses for shoulders etc etc.
Rest periods are short and for this reason most advocates of this type of training do not include any aerobic training as they feel that this makes inroads into the recovery system when the workouts themselves are extremely taxing on thecentral nervous system. Workouts are brief (usually less than 30 minutes) and infrequent (2 per week average)
Proponents of this are people such as Arthur Jones (Nautilus)Mike Mentzer, Ellington Darden and Dorian Yates. The system first surfaced in the 1970s, is quite controversial and does generate a lot of discussion.
Tony Caldwell (Old school strength coach)
(Strength training tips from Strongman Glenn Ross here)
Here is a quote from John Jesse, in his “Wrestling Physical Conditioning Encyclopedia”
stretch learning at Excelsior ADC
“The writer has consistently maintained over the years that very few, if any, athletes in the modern industrial culture, ever develop all -round body strength. Even those who accept the concept of progressive weight training overemphasize great strength development in the arms, shoulders and legs.
The majority of weight training programs designed for athletes emphasise lifting in the vertical plane with a straight back. Little emphasis is placed on a comparable level of strength development in the rotational muscles of the lower back, sides and abdomen.
Rotational, lateral and round-back vertical (upward) movements comprise the overwhelming majority of movements in the combative sports.”
This was written in 1974.
Unfortunately, these type of movements are often hard to quantify. This means that sometimes they are left out of programming because it is harder to show “progress” on a spreadsheet.
A good coaching and some athlete education will allow the athletes to realise progress in a more meaningful way: one that they can apply to their sport.
Over the past few sessions I have been going through the strength section of James’s Athletic Development Manual with him. We went through strength and velocity and how a high velocity exercise means the strength aspect could be low, and vice versa.
For example, tuck jumps are a high velocity exercise with a lower strength needed. Where as a deadlift variation (1-3RM) would be high strength and low velocity as you couldn’t repeat many.
Exercises were also broken down into 4 categories of strength:
absolute
relative
dynamic
elastic.
Also, there are many ways to overload that don’t include just increasing the weight. You can change direction or the plane of movement and you can change the speed or rest period too. Each way overloads the body and you have to make it adapt again.
The importance of reflection
During the last practical session I had with James and some of the athletes, he asked me what I have learnt. This really got me thinking. I have learnt a lot! I don’t tend to self reflect so I know I need to work on that. How can you improve as a coach if you don’t reflect on what you have done or learnt?
It’s made me look at my plans for the gymnasts and my personal training clients differently and I have re-thought a lot of their training. I think I had just got into a routine and needed that nudge to think about things a little more and reflect on my previous training and what James has taught me as well.
Self reflection, as I now understand, is an important part of coaching. It gives you the chance to think about how a session went, what you can do to improve it, what worked well or what did you learn. All these questions will help you develop and improve as a coach.
Keeping things fresh
It’s good to make regular changes to stop a program/session getting stale too. Plus, if you are training the younger athletes, it keeps them a lot more interested and more likely to work.
If you do the same thing day in day out, they will get bored and won’t progress. Repeating movements are important to get the technique right, but adding in a few changes will challenge them physically and mentally.
This has made me think of where exercises fit and I have been thinking about this a lot more when I train my clients at work or the gymnasts I work with too.
I have also learnt a little about myself too. I learnt that I need to be more confident and give myself more credit. For years my teachers and tutors have said this to me over and over again and I’m starting to see why now.
Following on from our blog on Front Squat vs Back squat, here is some information about what you might be aiming for with deadlift squat ratios.
Strength ratios
The table below shows an estimate of the weights you should be able to lift based on other exercises. I.e. if you can back squat 80kg you should be able to Deadlift 100kg’s.
Please note these are only approximate values which can be greatly affected by technique and vary among individuals. So avoid using them as written rule!
Deadlift
Back Squat
Front Squat
~100%
~80%
~68% (85% of BS)
60kg
48kg
40kg
70kg
56kg
48kg
80kg
64kg
54kg
90kg
72kg
61kg
100kg
80kg
68kg
110kg
88kg
75kg
120kg
96kg
82kg
130kg
105kg
90kg
140kg
112kg
95kg
150kg
120kg
102kg
160kg
128kg
109kg
For example, if you are practiced at the Deadlift but not the back squat, it is unlikely you will be able to back squat up to 80% of your Deadlift 1RM.
If beginning a new exercise it is better to underestimate your rep max as you can always add more weight!
If you lift too heavy the chances are YOU WILL BREAK!
In summary you should be able to back squat more than you can front squat, and Deadlift the same or more than you can back squat.
These are some of the lifts used in our Get Stronger programme here.
I have never been a deadlift fan, instead working on squats and using the snatch and clean to develop power.
However, I have recently been using it to create some variety in environments with no squat rack.
It is also useful with some athletes who find squatting tricky. One young hockey player with very long femurs, never looks good squatting. Her deadlift is immaculate. There is some similarity between the start of the deadlift and the positions that hockey players need to get into.
The deadlift works hamstrings more than the squat, which is obviously quadriceps dominant. Both exercises require a strong back and trunk. A football goalie I coach has a very sensitive back. For him, the deadlift is a definite No.
Ideally my deadlift should be nearly as heavy as my squat, but I am about 30kg short (Full analysis here: What is a good squat to deadlift ratio? ) Strength is exercise specific, and my squats are much more efficient.
A strength session using deadlift last week was unimpressive on my part, mainly due to inefficient deadlift technique. It was a reminder to myself to sometimes use variety in the gym, and to work on my weaknesses.
This video gives a guide to how to start the deadlift.
Assistant coach Fran Low was an experienced hockey player when she started working with Excelsior. However, she had never done squats. Part of her role was to research front squat vs back squats. Here are the results:
Unlike most males who spend many hours swanning around the weights in the gym, the squat was a relatively new and daunting exercise to me.
Having not spent much time strength training (reasons highlighted in this piece about females in the gym) I was unaware of the importance of the squatting movement and how it underpins most strength training exercises.
Body weight squat
I realised the true importance of squatting during the first few seconds of my first session with James. If you cannot squat correctly then don’t even think about lifting any weights!
I wanted to learn how to squat properly.This article aims to highlight details and techniques of the front and back squats as well as looking at the power ratios between the different exercises.
(James’ note N.B. before attempting to load with a barbell, make sure you can do body weight squats properly:
Back Squats:
It is one of the only exercises that directly trains hip drive (the initial movement out of the bottom of a full squat is hip drive).
Hip drive is important for any sport that involves running, jumping or lunging (so most sports really!).
The squat uses the whole of the so called posterior chain, that is the calves, hamstrings and glutes working together. Due to the large range of movement, the squat is very effective at synchronising and enhancing this movement.
It works the whole body requiring stabilising muscles to be trained as well as the gross muscle groups.
It also replicates a movement used in everyday life and most sports.
Variations:
Back squat: Barbell rests on the back of the shoulder, more info below
Front Squat: Barbell rests on the front of the shoulders, more info below.
Overhead squat: a squat performed with a weight/item (barbell, medicine ball, dumbbell, broomstick) above the head.
Hindu Squat: body weight exercise, squatting down onto toes, bringing heels to bum, and swinging arms down, straightening legs standing up and pushing from the toes.
bar too high
Back Squat Technique:
Approach bar in either power or squat rack.
Grasp bar using a pronated grip (width dependant on placement on back).
Stand upright with the bar resting across the upper back (supported by 1 or 2 spotters, if required).
Feet width self-selected, but no wider than shoulder-width.
Elbows high and as far forward as possible, to support bar.
Prior to descent, take a breath and hold it.
Bend slowly at the knees and hips.
Maintain a flat back throughout the descent.
Keep heels on the floor and do not allow the body to fall forward.
Try to keep the knee in line with the toe (don’t allow knees to buckle, this leads to injury!).
Stop descent at an appropriate depth for the athlete, ideally when legs are/past parallel to the floor.
Without bouncing raise the bar by extending hips and knees.
Keep back flat and head up.
Keep hips under the bar.
Hold breath through sticking point*.
At the completion of the set walk forward and replace bar in stands.
Back Squat – The good vs. bad
Pros
Cons
Total body workout
Cannot perform with back problems
Improve posture and balance
Trains the posterior chain
Can be dangerous if an incorrect technique
Squats can be uncomfortable
Trains stabilizing muscles leading to reduced risk of injury
Build Muscle/gain strength
Improve/maintain flexibility
Used to exercise everything from endurance to power
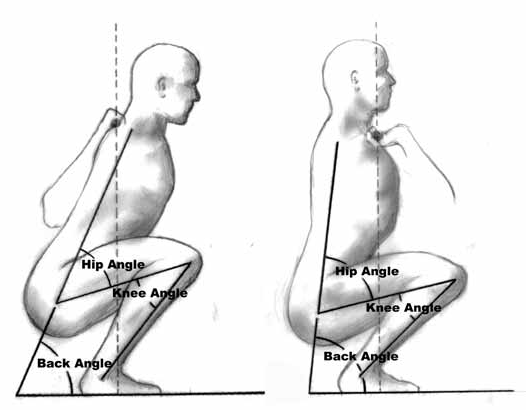
Front Squats:
This movement is more upright and so places a more direct workload on your quads. You won’t be able to lift as much weight as in the back version, though.
This key difference is highlighted in an image below and due to the greater hip angle, reduces the useof the hamstrings in the movement.
This means it does not activate the posterior chain and although good for working the quadriceps, can neglect the hamstrings. For this reason, it is not advised to solely use the front squat in training.
Front Squat Technique:
Same as back squat although instead of having bar placed on the back of shoulders it is placed on the front of the shoulders:
Keep elbows high (upper-arm, almost parallel to the floor) and chest up.
Your shoulders support the weight, not your hands. Open your hands, relax them. Two/Three fingers under the bar is suggested.
Perform same squatting action as the back squat; however you will find that your back will stay straight as you need to keep your chest out to balance.
Front Squat – The Good vs. the Bad
Pros
Cons
Requires/helps flexibility
Max front squat will be lighter than max Back squat.
Harder to ‘cheat’
Does not target the hamstrings and glutes unlike the back squat.
Build Muscle/gain strength
Often Limited by stabiliser muscle flexibility rather than quadriceps fatigue (wrists, shoulders, ankles).
More emphasis on quadriceps
Does not train the posterior chain
Can improve other lifts
Considered safer than the back squat
How I earnt how to squat properly
The best way to gain a true understanding of these two squats is to try them yourself! So that’s what I did….
Firstly I would say I felt more comfortable and stable during the front squat. I was able to squat lower. However, my wrists did begin to ache, suggesting that I should work on wrist flexibility!
I could lift heavier with the back squat but I also felt more wobbly! The key coaching point I took from James was “Sit down”. Everything else is very technical, but to get started that simple cue was the best.
Overview
There are many differences between the two squatting techniques which this article has aimed to highlight. To sum it all up it is evident that the back squat should be an exercise in every athlete’s repertoire.
To help with the back squat technique you can use the front squat, however don’t rely solely on the front squat as you will be neglecting the hamstrings and it isn’t as possible to lift as much weight.
Good coaching is essential for both types of the squat.
Learn how to coach the squat on one of our courses

 I was working with a group of young players this week- pretty new to physical training.
 If your focus is purely on getting bigger, then there are 2 potential downsides:
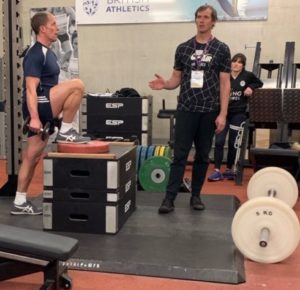

 Do you start your pre-season with an endurance fitness test? Your players turn up and do either the bleep test or the
  I checked this plan with some “expert physiologists at Brunel University” they thought it was a good plan.
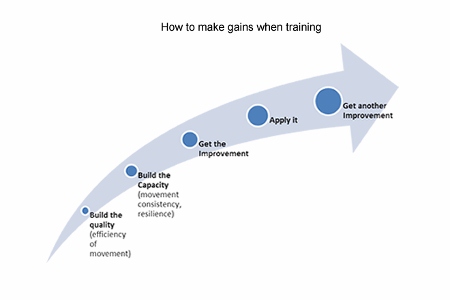
 Testing and evaluation are an important part of pre-season. But just telling players to run further or run faster to improve their test scores may only reinforce their bad technique, and could lead to injury.


 It’s good to make regular changes to stop a program/session getting stale too. Plus, if you are training the younger athletes, it keeps them a lot more interested and more likely to work.
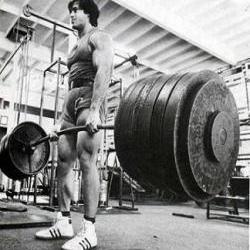 If beginning a new exercise it is better to
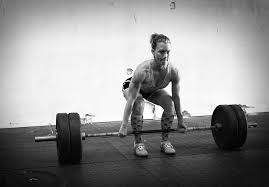
 Assistant coach Fran Low was an experienced hockey player when she started working with Excelsior. However, she had never done squats. Part of her role was to research front squat vs back squats. Here are the results:
 Front Squats: