Excelsior

Follow us on

excelsiorathletic@gmail.com

07976 306 494

Tag Archive: agility

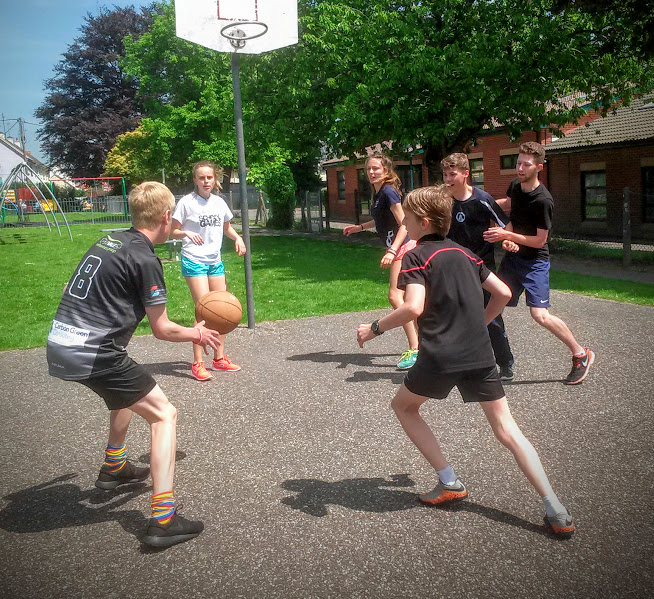
  1. How to get more agile and low to the ground for cricket fielding

    1 Comment

    Become more agile in 5 days.

    cricket fieldingWhen fielding in cricket, you are putting your body under a lot of stress and strain due to the stretching/reaching and diving to catch the ball.

    If the underlying strength and mobility behind these movements is poor then an injury is more likely.

    To do these movements successfully you will need to have good hip and knee control, and good flexibility too.

    I will be talking about how to improve agility and flexibility in order to get closer to the ground and show you a 5 day routine to help.

    Learning to co-ordinate and control your body when you are off centre or unbalanced will help. Exercises on one leg or one arm that challenge your body to balance and control are particularly useful Some of these are included in our regular 5x5x5 work that all Excelsior athletes do.

    Example exercises

    Pigeon walks will get you to the ground in a low and long position where you are stretching and also working on moving through the stretch and keeping the joints strong and stable.

    Arm reaches and lawnmowers will incorporate rotation which may be necessary to catch the ball. You could do the lawnmowers in a lunge position rather than a front support to feel a stretch and learn to control that low movement/position.

    The important areas to stretch

    Muscles that should be stretched are the hip flexors, hamstrings adductors, iliopsoas and glutes. All these muscles will be under pressure if you are lunging forwards to catch the ball.

     Static stretches

     Hip Flexor stretcheship flexor stetch

    hip flexor stretchThis picture shows a hip flexor twist stretch. It is the more advanced version and will also stretch your quads when you pick up the foot at the back.

    Adductor stretch adductor stretch

    Hamstring stretch –hamstring stretch

    Glute stretch –glute stretch

    Iliopsoas and hamstring stretch –

    iliopsoas stretch

     Example session plans for 5 days

     Aim – to work on control of own body and start to improve stability of hips, knees, ankles (very important for braking, turning and moving efficiently in game play).

    Some shoulder stability too. The first few days will include basic movements that concentrate on control and stability. Later on, more complex drills will be included.

     Day 1

    Warm up – 10x lateral squats, 100x skips – repeat x5

    Main activity – Hip series 1 (repeat x2-3)  Mini band walks (forwards, backwards and sideways)

    Circuit

    10 x scorpions 2 x rows of bear crawls 10 x overhead squats 2 x rows of crab walks

    10 x lunge and lean  Repeat x 5

    Stretches – include the above stretches. Hold for 20-30 seconds.

    Day 2

    Warm up – 10 x sit through, 10 x overhead squats – repeat x5

    Main activity – Hip series 1 and 2 (repeat x2 each)

    2x 10 single leg squats  1x row of pigeon walks, 10x overhead squats at the end 1x row of bear crawls, 10x lawnmowers at the end 1x row of side rolls, 10x lateral squats at the end  Repeat x 3-5

    Stretches – include the above stretches. Hold for 20-30 seconds.

    cricket agility Day 3

    Warm up – Multi-directional lunges, 100 x skips – repeat x5

    Main activity – Mini band work (forwards, backwards, sideways)

    Agility drill – set up 4 cones into a square roughly 10metres space between each.

    From cone 1 to 2, sideways bear crawl with 5x lawnmowers at 2.

    From cone 2 to 3, pigeon walks with 5xlateral squats at 3.

    From cone 3 to 4, sideways rolls with 5x back twists each side at 4.

    From cone 4 to 1, bear crawl with 5x lateral hop and holds at 1.

    Go through once slowly and controlled for practice, then repeat x2 timing yourself.

     Stretches – include the above stretches. Hold for 20-30 seconds.

    Day 4

    Warm up – 10x walk out press ups, 10x 6-way lunge – repeat x5

    Main activity –  Hip series 2 and 3

    Overhead squat and single leg squat work (re-enforcing lower body control and stability)

    Rolls – forwards, backwards, sideways. Running / crawling into and out of rolls. Circuit

    10x scorpions 2x rows of bear crawls 10x overhead squats 2x rows of crab walks

    10x lunge and lean  Repeat x 3-5

     Stretches – include the above stretches. Hold for 20-30 seconds.

     Day 5

    Warm up – 100x skips, 10 x alternate v sits x5

    Main activity – Mini band work (crossovers, single leg push back and single leg push back with reach)

    Agility drill (partners) – for this drill we will be adding the ball in to work on reactions.

    Set up 2 cones, 10-20 metres apart. Person A will stand in the middle of the cones, Person B will stand in the middle, 10metres away from Person A.

    Person B will roll the ball (slowly at first) to one of the cones and Person A will get there by any of the drills practiced, throw the ball back to Person B and run back to the centre.

    Bear crawls Sideways bear crawls Rolls (forwards, sideways)

    Repeat 3-5 times and swap over


    Stretches
    – include the above stretches. Hold for 20-30 seconds.

    This is just an example of training. Try it and see how it works for you.

  2. How to make Pre-Season Training Interesting, Relevant and More Fun

    38 Comments

    I Hate Pre-Season Training

    This is often the thought of players who are forced to undergo various fitness tests and long slow runs as part of a pre-season training and fitness programme.

    Doing repeated doggies, shuttle runs and various circuits, with barely a ball in sight, is enough to put most players off.

    It doesn’t have to be this way.

    (Contact James if you want help planning or running your pre-season training).

    As a Coach, you can make pre-season training interesting, relevant and more fun. Your players will be fitter, faster and stronger. More importantly, if they are willing, engaged and able to play, they will put more effort in.

    Why Pre-Season Training Needs to be Turned on its Head

    pre season training programmeDo you start your pre-season with an endurance fitness test? Your players turn up and do either the bleep test or the yo-yo test.

    You then train them for a few weeks doing lots of endurance running and retest them before the season starts.

    Is this interesting, relevant or fun?

    Or are you just gathering random numbers?

    I used to do exactly this. When I started working with London Welsh RFC 20 years ago. My plan was this:

    • Test the players
    • Develop an aerobic base.
    • Build up into intermittent endurance work with strength training.
    • Finish the last 2 weeks with speed training.
    • Re-test the players

    exercise physiology testI checked this plan with some “expert physiologists at Brunel University” they thought it was a good plan.

    Of course, they did: in a laboratory situation, this would look good as I was training for the test.  

    Over the last 10 years, working with hundreds of athletes I now realise that the situation should be reversed.

    As an athlete, I hated getting tested if I didn’t get the feedback, if I didn’t think it would help me fight better, or if there was no follow-up training plan to help me improve.

    Get Fitter, Faster and Stronger in Pre-season

    As a coach you want your team to be Fitter, Faster and Stronger. But fit for what? You want them on the pitch ready to train and ready to thrive in competition when the season starts.

    So, I look at developing 3 qualities:

    1. Efficiency: Get them moving well and with control
    2. Robustness: Get them able to do that under load, faster, further or heavier.
    3. Resilience Get them able to sustain that quality of movement or load for longer.

    Who wants to practice bad running, bad lifting, slow agility and irrelevant skill patterns?

    It is demotivating as a player, and a waste of your precious Coaching time as a Coach.

    pre season training programme

    How to Start Pre-season Training

    pre-season trainingTesting and evaluation are an important part of pre-season. But just telling players to run further or run faster to improve their test scores may only reinforce their bad technique, and could lead to injury.

    My overriding consideration as a Coach is to give the players the tools to do the job.

    Choose your tests carefully. If you are in a team field or court sport like Football, Hockey, Rugby or Basketball then the bleep test or yo-yo tests are relevant to the demands of the game. More so than a 1500m or 5km running (or even worse rowing) test to assess your endurance (more test detail here).

    But, understand that these tests measure more than endurance. They measure your ability to: accelerate, brake and change direction. All of which are needed in your sports (An example can be seen in this video).

    So, in conjunction with one of those tests, your first week would be well spent assessing the players’ ability to control their own body.

    Here is a FREE handout on the 5 tests that I use with players. (This is the Foundation week 1 of our Sports Training System)

    My motto is “Little things, done well, consistently.” If the players are given the tools to do the job, they gain confidence and progress accordingly. You have 6-12 weeks to get players fit, you have to ask yourself

    Robin Williams blind football

    Easy to get players tired

    Are you making them better, or just making them tired?

    Over the next few weeks we will be looking in detail at a different quality that is needed in pre-season training:

    If your players can accelerate and change direction faster, are strong enough to handle the braking forces when stopping and have a higher top speed, they will improve their test scores.

    You can then work on doing more quality movements with a shorter rest time: this will then lead to an improved work capacity.

    Most importantly: they will be able to transfer those fitness qualities to the Game where it counts.

    Please share with your teammates and fellow coaches. Have you got a favourite pre-season fitness test? Please leave a comment below. 

  3. Bite Size Agility

    Leave a Comment

    rugby agilityAgility for the real world

    I am trying to make agility workouts more frequent, more specific and a lot shorter in duration than has previously been done for the athletes I work with.
    I am starting with teaching them how to walk naturally (a recent report suggested that babies don’t spend enough waking time on their tummies, so don’t crawl as much and this leads to impaired physical coordination skills at primary school age), then faster movements, then with balls, then against opponents, then in small games.

    It concerns me when players say they are doing agility drills for fitness– rapid, repeated movements, including jumping and bounding, without adequate landing ability and leg strength will lead to injury.

    I would rather they work more specifically, with better quality, and then do more of those sessions each week. The warm up is a good place to work on it, see this video for an example (trainee strength and conditioning coaches).

    I also find the day after competition is useful. The players are tired which means they are keen to learn new skills with good rest times, it is also a change from the usual routine and we end with some fun agility games.

    Rugby agility drills

    Here are some recent ideas on how I have developed this with Rugby players as an example:

    Working with some rugby players on their agility I noticed how some of them do artificial movements in the hope that it makes them more agile. What I mean by artificial is a pre programmed series of steps\ head movements \ shoulder shimmies, rather than natural reactions.

    Steve Morris pointed this out in my own movements, and I have used his underlying principles in going back to basic movement patterns and then training them. We will then work on putting in unplanned scenarios and small game situations to work on the patterns under pressure.

    Today we worked on using skipping as a method of co ordinating hand and foot speed, specifically increasing the hand speed to make the feet move quicker. We then did some simple evading another person at walking speed with an acceleration to get past them.

    We then added the hand\ shoulder speed of movement to make the feet go faster. The key point here was doing it with the hands in a ready position, and using the internal plyometric action of the shoulder joint to help generate foot speed. That way the players get used to keeping their hands up ready for catching\ passing \tackling.

    The next thing was using head movement to generate change of directions- watch a baby crawl or move- the head always leads the body, not the other way round. As the players started to combine the head and fast hand actions, they started to lean forward into a better position to make a tackle, or to break a tackle.

    These are natural movement patterns. the key is to enhance them, not to run the players through a series of non specific drills that don’t address these issues. By the end of the session all the players had some idea of what to do. The key is now to make this a little and often practice, not leave it for months and get it trained out of them.

    Agility off the floor

    There is much more to Rugby agility than using ladders! Here is a video on how to get more agile at getting up from the break down, or back into defence.

    Read the detail here in How to get more agile for sport

  4. Plyometrics and Agility: Jim Radcliffe

    6 Comments

     “Try to be more like a super ball, not a tomato”

    plyometrics radcliffe

    Coach Radcliffe and me 2014

    Jim Radcliffe’s advice on plyometric training rang true as he went through a series of progressions for plyometrics at GAIN 2016.

    I have read his book on the subject, and seen him at 4 previous GAIN seminars. This is an updated post reflecting his latest cues, and my ability to coach these exercises better having been working with our athletes weekly on them.

    Jumping in place

    Coach Radcliffe looked at starting from the basics and working on the correct mechanics from the start. The key is to work on the vertical displacement of the hips. He used these cues to help:

    • Thumbs up with 2 hands- links to sprinting
    • Toes up: ankles locked and loaded
    • Head to ceiling: just do it and land quietly.
    • Land ready to take off again.

    We did these barefoot on grass to start with: it helps correct faulty foot mechanics and get a better “feel” for what is needed.

    Jump Progressions

    plyometric

    Plyometric training

    Once the players can do this he uses multiple responses with a pause, so 3 jumps with 2 seconds rest in between. Landing ready to go again. Then do 4-6 in a row.

    Then squat jumps with hands behind the head, with a pause, and bending the knees to get more of a positive shin angle. Repeating these in a pogo fashion with the thumbs up again.

    Rocket jump– reach up and down, could reach side to side too.

    Tuck jumps-like slide kicks in sprint drills where the heel strikes the butt like sliding up a wall. Or knee tuck with heels in front of the body, hands by chest, knees to hands. Then multiple responses with hands moving up and down.

    Spatial jumps– use split jumps, then split jumps switching legs.

    Depth jumps– makes sure you land in position correctly. Use “shock” to react and spring back up by not looking at the landing.

    Travelling Forward

    We then looked at linear progressions of bounding with a horizontal displacement of the hips.

    Prance: both feet land and take off at the same time: not skipping. You should hear 1 sound at a time (note to coaches who have music blasting out: you are eliminating one of your key senses).

    Gallop: 1 foot forward, keeping the front foot under the body though. The cue “driving like a piston” helped me more this time around.

    Skipping: extended skips forward with a step high, projecting the hips forward.

    Bounding: 1 leg to the other like a prancing activity “Load and fire”, “Load and fire”.

    Bounding with more knees drive, working on distance. Bounding with zig zags concentrate on landing.

    Hopping: more like top speed work. Over small hurdles “cycling the legs” landing with a pause, then multiple responses. Multiple double leg hops, then with single legs. Then start from a sprinters position and do diagonal hops, again cycling the legs.

    Advanced plyometric drills

    These drills are getting quite advanced now. He then worked up to what he did on the 2nd year of training with the guys. Posture is the determining factor for progression. Can you do a single leg squat with the rear knee touching the floor? if not, then “err on the side of doing too little.”

    Hopping over obstacles and immediately changing direction on one foot, with gradually more acute angles of turning was the start place. When landing, make sure you avoid doing a split step to move. Just push from the hips.

    Coach Radcliffe emphasised the need for minimal ground contact time. What are labelled “plyometric” on the Internet are often just slow jump drills. I discussed with Jim the fact that I find working more on lower level jumps with our athletes and trying to improve the timing and coordination seems to be effective. He said, “me too“.

    (An example of how to introduce jumping is in the video below. This is where I have found best to start).

    Agility work

    As if the above plyometric drills weren’t going to help your agility! We have previously looked at on the field type work.

    • Turn and Run Mechanics (simple)
    • Speed cuts: moving off the inside foot, like a pivot action. (Temporal)
    • Power cuts: moving off the outside foot. “Sit , dip and drive.” (Temporal)
    • Reactionary movement skills.(spatial)
    • Games and skills drills (open)

    Much discussion has taken place on the “false step” what is known in the USA as a “plio step”. (Radcliffe and Gambetta were quite vehement in coaching this out of players who are doing it. This year, Ken Clark brought another perspective on this, so this discussion will continue).

    Instead, work on the plant foot under the hip, then power the hips away. Not plant the foot outside of the body and push.  The idea was to eliminate lots of foot movements that may look fancy, but don’t actually get you moving anywhere.

    (All the time Radcliffe was demonstrating drills he talked about hips, but it was actually his head that lead every action he was doing. That is something I learnt from Steve Morris and I incorporate into the agility work I do with every athlete).

    The Sway Drill

    A sort of trademark feature from Radcliffe is his Oregon Sway drill and it is a great idea for lateral agility. Using 2 small cones or plastic cups, the athlete works on a series of movements that start small and then work up bigger. It requires the ability to squat properly, and to turn, pivot, sway and push hips laterally.

    Next up was working on lateral starts, using a crossover step, or the same side leg, but opening up the hips. Then backwards turns. Radcliffe also recommended working in a sandpit sometimes to create an external load and level of difficulty.

     Summary

    plyometrics

    Coach Radcliffe and me

    Great presentations and demonstrations, with ample time this year to practice. I like “having a go” and feeling it.  Radcliffe is superb, and there was more time to open things up for discussion: like the “false step” or “hip projection”.

    I have revisited what I do, and taken away the sway drill and Gambetta’s foot dot drill as simple closed drills that athletes can do away from me with easy progressions. We use these on a weekly basis.

    Sport requires speed and power, the training should reflect that. It is easy to get caught on what you can do on a platform or lying down on a bench. At no point did we use an agility ladder!

    Next: How to develop speed

    We use these principles in our Jump Higher programme and at our Athletics Club 

  5. Periodised agility?

    1 Comment

    Periodised agility?

    Agility is like any other fitness component, it follows the principles of training of:

    • Specificity
    • Overload
    • Progression
    • Reversibility.

    The balance between specificity and overload is a crucial one. Your agility can’t just be Organised Despair, nor can it be just playing games.

    One way of overloading the balance/ control system is to practice transferring from stable to unstable surfaces. I am not a believer in circus tricks: standing on swiss balls has very little transfer to real sport.

    rebounderOne drill I use as part of a progression is a series of quick lateral steps and then a single leg stick and hold. Start on your right leg and move rapidly to your left for 3-5 metres and stick the landing on your left leg.

    Repeat to the other side. A progression is to finish on a rebounder (pictured with Dan James demonstrating) or a different surface such as grass.

    For someone like Dan (GB Goalkeeper for Blind Football) who has good lateral movement and control, we need to add a different stimulus to over come the plateau.

    We can also go further, faster, or add more complicated movements. We just can’t stay the same.

    (More on structuring your agility training here)

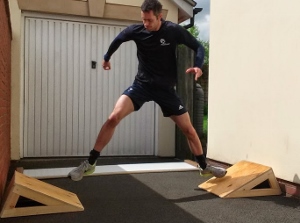
  6. 4 steps to get more agile in pre-season.

    7 Comments

    It’s better to run around people than through them.

    rugby agilityThe ability to run “through spaces not faces” is very important in most field/court sports. You want to be agile enough to:

    • Avoid being tackled
    • Be able to get into a position to stop your opponent
    • Get to the ball.

    Is your pre-season agility training helping you achieve this?

    Do you have a series of ladders and cones laid out and run around them?

    football agilityOr, are you really advanced and have a slalom series of poles laid out? Does that get players more agile, or just more tired?

    Small-sided games are very popular, and one coach said to me “Gareth Edwards never needed coaching”. Nope, but he grew up at an age when kids played British Bulldog and kick the can, and had proper PE lessons where they had to get hot and sweaty.

    Nowadays, your team is made up of desk jockeys or couch potatoes, so the basics have to be built in and reinforced whatever your level.

    Agility training should be more than Organised Despair. It requires coaching, progression, variety and application.

    A 4 Step Approach to Getting More Agile

    Here is our approach to getting players more agile.

    how to get more agile

    1 Body Control.

    This is the foundation where the importance of strength and balance are emphasised. This allows better force reduction, force stabilisation and then force production (more details here).

    single leg squatThe use of Single Leg Squats, multi-directional lunges, multi-directional hop and holds are essential. For the upper body, the use of lawnmowers sprawls and sit throughs are coached.

    These then become part of the Team’s warm-up drills.

    (Get your Free 5-day agility training programme here)

    2 Planned Movements. Turn and Run, Rolling and Crawling mechanics.

    Coach the push-off 2 feet in different directions: forward, side and backwards. The open step and crossover step are both practised.

    pre-season agility

    Practise getting up off the floor

    Agility is not just important when standing up. A lot of time is spent getting up and down off the floor in sport. Players need to be taught how to land safely and then get back up quickly.

    Forward rolls, sideways rolls, and backward rolls are all important parts of this. Bear crawls are useful to help teach sprint mechanics from the floor and short distance acceleration. These can then be combined to form a warm-up sequence like this video.

    This is then rehearsed in drills like the Oregon Sway Drill and Foot Dot Drill. 

    3 Reactive Drills.

    Once your players have practised their mechanics and learnt how to use them in sequence, you can start getting them to react to different stimuli. 

    football agilityThis puts time pressure into place and you can see how robust the players’ techniques are. The cues can be:

    • Visual (partner or coach moving, a ball moving)
    • Auditory (left, right, go, or the sound of a ball being kicked)
    • Kinesthetic (partner push, feel of the ball on feet)

    4 Random and Chaotic Games and skills drills.

    Now is the chance to put the different movements into place. For example, having your players work on a 2 vs 1 drill in a narrow linear channel would follow on from the Foot Dot Drill.

    pre-season agility for football

    Excelsior athlete Dan James

    Having them work on a 3 vs 2 in a wide lateral channel would follow on from the Oregon Sway Drill.

    This gives the players the chance to rehearse in a “limited open game“. There are specific rules and boundaries, but decisions have to be made and reactions and agility are tested.

    You can do all 4 of this sequence in each session: If you spend 5 minutes on each part, then you are progressing through the learning process. After 20 minutes your players will be warmed up, be moving better, and have had to practise making decisions.

    How to Test Pre-Season Agility

    Agility is the ability to change direction at a pace in response to a stimulus. Unfortunately, most agility testing just measures the ability to change direction at pace, without an appropriate stimulus.

    As you may have gathered from our previous posts on Pre-season training, we are not fans of testing for testing sake. If you do test agility, be aware that you are measuring your players’ ability to accelerate, brake and change direction. 

    Do not use the test as a selection process as decision making is not measured.

    The 3 cone L weave is an easily administered agility test, that measures the change of direction of both feet in a speed cut and a power cut.

    Next week, we will look at getting your team faster in Pre-season.

    If you want your team to get more agile, contact James to come and run a workshop.

  7. “The true Art to what, how and why we do”: Jim Radcliffe

    2 Comments

    What it takes to be a successful strength and conditioning coach.

    “People in support positions should be seen and not heard” Jim Radcliffe strength and conditioningJim Radcliffe at the beginning of his presentation on successful S&C coaching.

    (By successful, he means producing extremely fit, agile and fast athletes that then produce results on the field, court, track or pool. Rather than how many twitter followers you have got!)

    Successful coaches explain the “Why”

    Most coaches are good at telling athletes the what to do, some are really good at explaining the how, but very few are great at understanding the Why.

    simon sinek's golden circleRadcliffe explained this at the outset, based on Simon Sinek’s Golden Circle, coaches need to understand why they are doing things, before they start just doing exercises or drills.

    His #1 factor of great or elite athleticism is acceleration or burst. The more people in the team who can do this, the better. This is the why.

    Rehearse consistently is the “how”

    In an average football practice at Oregon, they have 90+ acceleration reps for the exterior positions and 65+ for the interior positions.

    This includes burst requiring decision making. An example was his Punt Returners hold lacrosse balls when about to return a punt. This forces them to have correct body alignment and position when they do catch, which then facilitates a burst upfield (a great example of task constraint for you motor learning buffs).

    Negative practice drills which detract from the ability to burst must be eliminated. This includes the butt kick drill which just encourages a pendulum swing action and overstriding when running: failure practice!

    Thwe warm up is an opportunity for rehearsal, rather than just getting warm. Radcliffe teaches and reinforces  push mechanics in every warm up.

    “Agility is about efficient transitions”

    agility transitionsAgility progresses through these stages:

    • Start
    • Acceleration
    • Deceleration
    • Change of direction
    • Reacceleration

    This requires the ability to maintain correct posture as the body flexes, extends and rotates (pic of Excelsior athlete Sean Clifford).

    One great tip was to emphasise knee seperation over foot seperation. If the feet are getting further apart than the knees, then it shows poor hip projection.

    Ladder drills are redundant because they do a lot of footwork, but do nothing for knee seperation and hip projection.

    agility drillsThis can easily be seen in drills such as the one pictured with mini bands. The athlete at the front as feet coming out wider than the knees (poor hip projection) the athlete behind has knee above foot (better hip projection).

    Every drill and every athlete must be coached to ensure consistency.

    The 2 key points to be emphasised here are

    1. Body posture cues.
    2. Increase strength- power-impulse.

    How to develop explosive power on the pitch

    Being able to apply and strength and power develeoped in the gym onto the pitch requires the ability to apply great force over a small base of support and great righting and tilting reflexes.

    Radcliffe said that explosive power can be borken down into 3 areas as shown in diagram below.

    how to develop explosive power

    This requires practicing fast, explosive intense movements. Another key point was “The more time spent on the ground =the more BAD things happen than good.”

    Here Radcliffe was talking about an athletes’s ability to negotiate the ground. The ability to turn and run fast is a sign of efficient quickness and correct mechanics. There is a need for fast response to a stimulus.

    Placing the feet outside the knees is a sign of the less agile athlete:  (I question the transference of ultra-wide squats to agility work: hence my athletes squat with feet under hips).

    agility drillsOne of the ways to get the athlete to improve mechanics is to train barefoot. This give better immediate sensory feedback about the ability to have a spring loaded foot, rather than a flat foot.

    The whole foot lands on the floor, but only a tiny heel mark is left on the grass or sand. A spring loaded foot is essential for running fast and quick turns/ reactive jumps.

    Agility drill progressions

    Radcliffe spent some time going over how he progresses his agility work with his athletes.

    Starting with the two basic actions of:

    • Speed cuts: Pivot action, rolling off the inside foot.
    • Power cuts: The sit, dip and drive action, pushing off the outside of the foot.

    He then progresses to the Sway drill, lateral starts, backward starts and then elastic lead-ins to the the speed and power cuts. This could be stepping off a chair and landing on the outside edge of the foot to push sideways for a power cut.

    This then leads to to reaction drills (with directional components such as a clock drill) to a games related skill or drill.

    Summary

    How to get agile for sportsFrom Day 1, practice 1, Radcliffe emphasises the “Go as fast as you can go” approach to training. Initially this may only be 1/2 steps in different directions, but they are FAST.

    This seminar showed how Radcliffe has a truly great understanding of Why, brilliant progressions of how, and then practically he can do the what.

    Jim radcliffe agilityWhat is really refreshing about Jim Radcliffe, is that he is at GAIN to learn as much as to teach, he is always writing notes, or asking the different presenters questions so he can improve his own practice (see pictures of him sharing with Vern Gambetta and Finn Gundersen).

    This is the 4th year in a row I have seen him present, and I always get something new. I have completely changed how I coach agility and pliometrics as a result of seing him in action. Highly recommended.

    Further reading:

  8. Why agility training is like learning to ride a bike

    12 Comments

    agility training

    No pedals, no stabilisers

    If, like me, you learnt to ride a bike using stabilisers, you might remember the various attempts of trying to do it without them.

    For me this involves vague memories of pedalling like a lunatic with my Dad saying “I’ve got you” (when he blatantly hadn’t) and me steering into ditches.

    I now have the joy teaching my kids how to ride a bike (or rather creating environments where they learn themselves). I got great advice from Ralph Colman cycles and bought a balance bike for Daisy. The reasoning was that the pedalling is easy, it is the balancing that is tricky for toddlers.

    She rode this for about 18 months, then we switched to a pedal bike on her 4th birthday. After a few wobbly starts she was off and cycling on her own, no stabilisers. She can now do a 2 mile loop around our village with no trouble.

    How does this relate to agility training?

    Movement in sport can be classified as requiring 3 things:

    1. Force stabilisation (balance)
    2. Force reduction (braking)
    3. Force production (propulsion or pedalling for cycling!) (Vern Gambetta’s performance paradigm).

    A lot of sport coaches work only on force production, mainly because it is easily measurable. How high can you jump? How much can you squat? How fast can you run 10 metres in? The problem with this is that very rarely do you have to do these things in isolation when playing sport.

    torzie boylett hockeyWhat happens at the end of your 10m run? You either have to stop, make change of direction, execute a skill or make contact with an opponent.

    What happens after you jump? You have to land!

    Just working on force production (which looks like a quick fix) is a narrow focus and has a very limited application at best, and a high potential for injury at worst.

    If you get all your athletes jumping higher, or able to run faster, without teaching them how to stabilise and brake, nasty things happen to their knees.

    You are teaching them how to pedal faster using stabilisers, as soon as the stabilisers come off (they step into the sporting arena) they fall over!

    What we do for our athletes

    If you have a balance bike, you first learn how to balance, then how to brake, then how to propel yourself.

    So in order to become more agile we:

    1. Build a foundation that works on stability and balance as well as strength
    2. Work on braking (hip, knee and ankle flexion) for 2 legs and 1 leg
    3. Work on propulsion in all directions, starting up, then forward, sideways and turning.

    bike ridingOnce your athlete can do this, in conjunction with their technical and tactical training, your sporting performance has a much stronger base to launch from.

    This then allows the athlete to perform their technical skills more consistently, faster and more safely.

    You can then start to use agility drills that require decision making as part of a systematic agility training program.

    As to my kid’s cycling, Jack seems more interested in practicing reversing up hills on his balance bike. You can’t win them all.

    Further reading

  9. Using RPE to predict 1RMs- Harrison Evans

    1 Comment

    harrison evansHow to use RPE to predict your strength

    Much of the strength related exercise prescription advice delivered by the American College of Sports Medicine (ACSM) prescribe intensity relative to an individual’s maximal strength (1-RM)

    This is subsequently used in gymnasiums and clinical environments. For example, an imposed demand of 40% 1-RM may be adequate for a strength related cardiac rehabilitation programme, and a few reps at 90% of 1-RM may be used to increase explosive power in athletes.

    However, it’s not always safe to perform an initial 1-RM test (in many clinical settings) and may be time-consuming (when working with a large group of athletes).

     Problems with predictions over actual results

      Various prediction equations have subsequently been developed, but not without large and potentially dangerous error. My investigation used perceived exertion (a perception of how hard we feel we are working) to predict 1-RM. 

    I used 20 healthy students (yes, healthy students do exist) a relatively small sample but large enough to examine validity in this case. I tested their maximal strength for upper body (biceps curl) and lower body (leg extension) exercises.

    I then calculated 20%, 40% and 60% of individual 1-RM and asked individuals to perform two repetitions at each intensity for each exercise. For these tests the subjects were blindfolded and the load intensities were delivered in a random order to eradicate any predetermined judgments about the load.

    After two reps at each intensity, subjects were required to state an RPE  ranging from 6 (no exertion) to 20 (maximal exertion). From this, the RPE values at the three submaximal intensities were plotted and regression analysis conducted to extrapolate to 20 (theoretical maximum on the scale).

    Without getting bogged down in the statistics, there was no significant difference between the actual 1-RM and the predicted 1-RM, and the correlations between actual and predicted 1-RM were strong. 

    What does this actually mean?

    Findings show that it is plausible to use an index of how hard we feel we are working to predict our maximal strength in both upper and lower body exercises.

    It’s easy to criticise this on a number of levels:

    • Sample population used
    • Sample size
    • Exercises performed
    • Errors in statistical tests
    • Applicability to sports-related settings 

    amongst others. I don’t profess this study to be revolutionary or add immediate gain to the fitness industry, nor is it possible to use this as a standardised prediction protocol in its bare form.

    It is however novel in its methods, something that has never been done before, providing a base for which others can validate with different populations and muscle groups.

    Using just two submaximal repetitions makes this an extremely quick and low-risk method for predicting strength.

    I welcome all feedback, questions and criticisms, without these I can’t improve my future studies. So if you’re a coach, teacher, athlete or fellow student I need you, lets start some hot debate about why this is good or simply not good enough for you. Bring it on! 

    Harrison Evans is studying for his Msc at Exeter University. His research can be seen here